How to use Puppeteer with Docker to test uploading a file to a web form
May 30, 2019 ☼ JS ☼ tests ☼ Puppeteer ☼ Docker
Puppeteer is a Node.js library built by the Chrome DevTools team that allows you to control headless Chrome.
You can use Puppeteer for many things like web scraping, pre-rendering SPA, taking screenshots, perform end-to-end tests etc.
In this article I will show you how to test a web form that requires a file to be uploaded.
I had to write something similar recently at work so I thought to extrapolate a few bits and pieces and share them with you.
Hope you’ll find this article useful :)
Requirements
- Puppeteer
v1.9.0 - Jest
v24.1.0 - NodeJS
v10.15.3 - Docker
What are we testing?
The form is pretty simple:
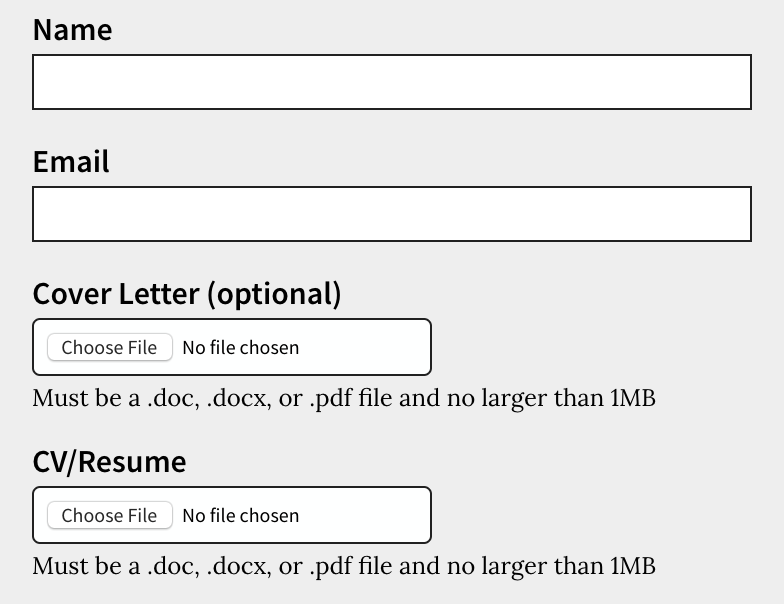
We’re going to test if we can successfully submit a file (Only the happy path for sake of brevity). You can of course test other cases such as if the file is larger than 1mb, for example.
Setup
We need to set up a few things before: Docker image, Jest and Puppeteer.
I’m not using any library like jest-puppeteer because I like to have full control of my tests and I felt it was just too magical.
All our tests are in docker/e2e-tests.
Docker image
The docker image is pretty simple, we don’t need many things here
FROM  node:10.15.3-jessie-slim

MAINTAINER add-your-email@gmail.com

# This is necessary to run Puppeteer on Docker
RUN apt-get update && \
apt-get install -yq gconf-service libasound2 libatk1.0-0 libc6 libcairo2 libcups2 libdbus-1-3 \
libexpat1 libfontconfig1 libgcc1 libgconf-2-4 libgdk-pixbuf2.0-0 libglib2.0-0 libgtk-3-0 libnspr4 \
libpango-1.0-0 libpangocairo-1.0-0 libstdc++6 libx11-6 libx11-xcb1 libxcb1 libxcomposite1 \
libxcursor1 libxdamage1 libxext6 libxfixes3 libxi6 libxrandr2 libxrender1 libxss1 libxtst6 \
fonts-ipafont-gothic fonts-wqy-zenhei fonts-thai-tlwg fonts-kacst ttf-freefont \
ca-certificates fonts-liberation libappindicator1 libnss3 lsb-release xdg-utils wget && \
wget https://github.com/Yelp/dumb-init/releases/download/v1.2.1/dumb-init_1.2.1_amd64.deb && \
dpkg -i dumb-init_*.deb && rm -f dumb-init_*.deb && \
apt-get clean && apt-get autoremove -y && rm -rf /var/lib/apt/lists/*

WORKDIR ./docker/e2e-tests

COPY . .

RUN chmod +x ci-run.sh;
ci-run.sh looks something like this:
#!/usr/bin/env bash

# exit on error
set -e

npm ci
npm run test
NodeJS
My devDependencies in package.json:
{
    "devDependencies": {
    "@babel/core": "^7.3.3",
    "@babel/preset-env": "^7.3.1",
    "jest": "^24.1.0",
    "puppeteer": "1.17.0"
    }
}
After installing all the dependencies we’re going to write some boilerplate code:
// shared.js

const puppeteer = require('puppeteer');

class BrowserSession {
    async setup() {
        this.browser = await puppeteer.launch(
            {
                args: ['--no-sandbox', '--disable-dev-shm-usage', '--disable-setuid-sandbox'],
                ignoreHTTPSErrors: true
            }
        );
        process.on('unhandledRejection', (reason, p) => {
            console.error('Unhandled Rejection at: Promise', p, 'reason:', reason);
            this.browser.close();
        });
        this.page = await this.browser.newPage();
        // Makes possible to use console.log inside page.evaluate() callback
        this.page.on('console', msg => {
            for (let i = 0; i < msg.args.length; ++i) {
                console.log(`${i}: ${msg.args[i]}`);
            }
        });

        // Getting some useful debug logs
        this.page.on('pageerror', err => {
            console.error('Page error: ' + err.toString());
        });
        this.page.on('error', err => {
            console.error('Error: ' + err.toString());
        });
        this.page.on('requestfailed', request => {
            console.error(request.url() + ' ' + request.failure().errorText);
        });
    }

    async teardown() {
        await this.browser.close();
    }
}

module.exports = new BrowserSession();
Will see later how this setup will streamline the creation of multiple tests.
We got some more boilerplate code to write though:
You can avoid doing all of this and call directly
puppeteer.launchbut if you have to write a lot of tests this will get tedious very soon.
// utils/index.js

import browserSession from '../shared';

/**
 *
 * @param {string} path Path to be tested (/path/to)
 * @param {string} params Extra Query params (must start with ?): ?location=asdads&text=123231
 */

const setUpTest = async (path = '', params = '') => {
    const URL = `https://www.yoursite.com${path}${params}`;

    // We use this header to remove Ad Units from our app for example
    await browserSession.page.setExtraHTTPHeaders({
        'X-E2E-TEST': 'test'
    });
    await browserSession.page.setViewport({
        width: 1440,
        height: 900
    });
    }
    await browserSession.page.goto(URL, {
        waitUntil: 'networkidle2'
    });
};
Good. Now let’s write the real test!
Jest
import browserSession from '../shared';
import {setUpTest} from '../utils';

describe('Form page: /path/to/form', () => {
    beforeEach(async () => {
        await browserSession.setup();
    });
    afterEach(async () => {
        await browserSession.teardown();
    });
    describe('Application Form', () => {
        beforeEach(async () => {
            await setUpTest('/path/to/form', `?id=1222`);
        });
        test('User should be able to upload a file', async () => {
            // Fill the form fields
            await browserSession.page.type('#name', 'Nicola');
            await browserSession.page.type('#email', 'nicola@test.com');

            const filePath = './assets/fakeFile.pdf';
            const input = await browserSession.page.$('#cv');
            await input.uploadFile(filePath);

            await browserSession.page.evaluate(() => {
                document.querySelector('input[type=submit]').click();
            });
            await Promise.all([
                browserSession.page.waitForNavigation({waitUntil: 'networkidle0'}),
                browserSession.page.waitForSelector('[role="main"]')
            ]);

            const title = await browserSession.page.evaluate(() => {
                return document.querySelector('.p-global-content h1').textContent;
            });
            expect(title).toMatch(/Thank you/i);
        });
    });
});
First of all we wrap the test inside a describe function. In the body of the function we lunch and close Puppeteer after we’re done testing.
The setUpTest function it’s just a convenient method to test a specific URL with some params.
After we have uploaded a mock file with the uploadFile() function provided by Puppeteer we submit the form and we validate that everything is fine and the user gets redirected to the thank you page.
That’s it :)
As I mentioned earlier on you can add multiple tests to cover other cases. Just add another test('', () => {}) inside the inner describe.
Hope this was useful to you!
Happy testing!
If you have any suggestions, questions, corrections or if you want to add anything please DM or tweet me: @zanonnicola